Today’s blog isn’t really about giving you a great recipe for a cake… rather…it’s about handing over some tips and tricks to achieve a professional looking cake. They say you eat with your eyes, and then your mouth…so here’s some tips to help make your everyday cake into a visual FEAST!

I’ve used a simple recipe for chocolate cake and combined it with some cream and cherries (variation of a Black Forrest Cake). But you can apply the following strategies to your own favorite cake recipe.
Lastly, I need to say that this blog contains a bit of information overload. The tips don’t require a lot of technical skill, but they do require practice. Don’t expect to master all of the steps on your first try. Just be prepared to share and enjoy lots of yummy cake along your learning journey.
You will need:
For the cake:
190g butter
1 1/2 cups water
3/4 cups dutch cocoa
3/4 teaspoons bicarbonate of soda
1 1/2 cups caster sugar
1 3/4 cups self raising flour
3 eggs. lightly beaten
For the filling:
1/3 cup syrup (this can be the left over liquid from your canned fruit, or simple sugar syrup*)
Tip #1 : You can add a tablespoon of liqueur to the syrup for extra kick (kirsch, brandy or Cointreau work well with this recipe)
*Note: Sugar syrup is made by boiling together equal quantities of sugar and water.
600ml cream
1 jar sour cherries, drained (or fruit of your choice)
Decoration:
100g chocolate (optional)
Strawberries, raspberries etc.
Preheat your oven to 180’celcius. Line two 18cm cake tins with baking paper.
Place the butter, water, cocoa, sugar and bi-carbonate of soda into a saucepan, over heat. Stir until the sugar has dissolved. Bring to the boil and allow to simmer gently for 2 minutes. (This mixture has a tendency to boil over, so keep an eye on it.)
Remove from heat and allow to cool to room temperature. Whisk in the eggs and flour until combined. Take care not to over beat. Pour into the cake tins and bake for 30 minutes or until the cake springs back when pressed.(check out this quick video to see how this is done)

Allow to cool slightly before turning the cakes out.
Tip #2: Once they are completely cool, place them in the freezer for a couple of hours. Freezing the cakes allows you to achieve a clean cut when it’s time to cut the layers. It prevents the cake edges from crumbling and looking sloppy.
While the cakes are cooling, melt your chocolate. Pour it onto a sheet of baking paper. spread it thinly and evenly so that it is about 1-2mm high. Leave to set.
Tip #3: When cutting your cake, start by lopping off the wonky dome of the cake, so that you are left with a tidy cylinder shape. (Tip #4: Pop the excess cake in the freezer, and use it to make rum balls or cake pops etc.) Then carefully cut the cylinder horizontally, into two even slices. Repeat with the other cake.

Tip #5: Whip the cream so that it forms SOFT peaks. It may seem too soft, but rest assured, it will firm-up in the fridge. Over beating cream means that you end up with half-churned butter, resulting in a yellowy lumpy filling. Blahhhhhh!
Place one of the bottom layers of your cake onto a cake stand or flat plate (bottom side down). Keep the bottom layer of your second cake to use as the top layer of your cake tower (with the bottom side up).
Tip #6: Brush with the syrup. (this makes your cake super moist)
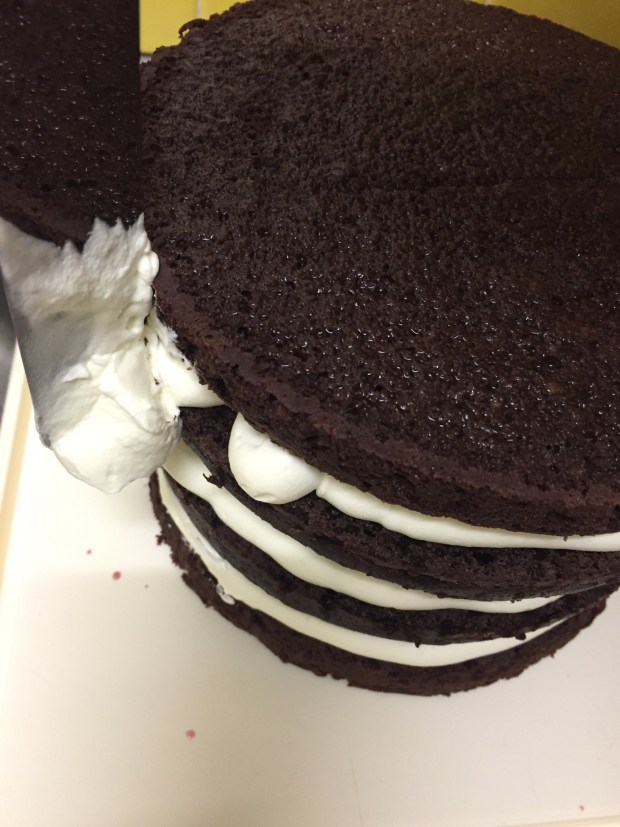
Pipe some cream onto the cake, as shown.
Tip #7: Fill the gaps with cherries. Using this pattern means that you will get a nice cross-section of cherries and cream when you serve your cake.

Place the next layer of your cake over the cherries and cream. Bring eye down to cake level, and check that the cake top is flat. Press down any part of the cake which is not flat.
Repeat with the remaining layers of cake and cream.
Use a palette knife to fill in the sides of the cake.
Tip #8: Take care not to mix crumbs from your knife back into your bowl of fresh white cream, as it will make your cake look mucky.
Leave to set in your fridge. If your are preparing your cake in advance, I would recommend place it in the freezer. This allows it to set completely, and makes for easy handling later. Also, cream ages quickly in the fridge. Freezing is the best way of preserving it’s freshness.
To decorate, break the chocolate into large chunks and insert pieces into the top of the cake. Scatter berries between the pieces of chocolate.

